You've just gotta watch this. It's too hokey not too, (and you know I love hokey things.) I'll never be able to look at a stalk of broccoli in quite the same way.
Now I am not so much in to "Organic" as I am a believer in an (UN)common sense when it comes to gardening. NO herbicides and NO pesticides. This is how we grew our food for generations. Connect with your local (Un)common sense farmer.
'Nuf said.
Showing posts with label Garden. Show all posts
Showing posts with label Garden. Show all posts
Wednesday, April 20, 2011

Wednesday, April 13, 2011
Fruit Trees!!!! I've got Fruit Trees!!!!!
This has been a long time coming...
I've wanted to plant fruit trees since we moved to this property 10 years ago. We tried to go the less expensive way and buy bare root trees. We brought them home and immediately placed them into water for 12-24 hours, as was suggested by the producer. Then we planted them.


1 Girl Tree
I've wanted to plant fruit trees since we moved to this property 10 years ago. We tried to go the less expensive way and buy bare root trees. We brought them home and immediately placed them into water for 12-24 hours, as was suggested by the producer. Then we planted them.
They Died.
The next year we tried again. Again we followed the producers instructions, even check marking off at each step. AND!
They Died.
I gave up. Well obviously not entirely, cause fast forward to this year - 2011. I was driving past the farmer style store (obviously not fast enough - I'll have to work on that.) on my way home about a month ago, and there was a sign calling out my name: "Fruit and Shade Trees." I stopped and talked to the man in the greenhouse area. They were NOT bare root. They were three years old. They looked healthy. They were budding out appropriately for the time of season. They were outside, and had been outside for several weeks. I left.
I obsessed about them for two more weeks. I went back to the farmers style store. I bought six trees.
- 1 Sweet Sixteen Apple
- 1 Granny Smith Apple
- 1 Lapin Cherry
- 1 Rainier Cherry
- 1 Bartlett Pear
- 1 Sungold Apricot
We planted them yesterday.
 |
| Quincy helped. |

Oh, and this time we used a Miracle Grow product to "fix" the roots system and help them establish easier.
I still need to buy and plant:
- 1 more Apricot - for cross pollination. They didn't have another type, so I didn't buy a second.
- 1 more Pear - for cross pollination. Same deal.
- 2 plums - I want one Italian and one Red type.
I'll be watching, and watering and worrying about them for quite awhile. Sure hope this works.


Oh, and we also decided to plant a couple children to see if they would grow more:
1 Boy Tree1 Girl Tree
Yeah, cause that's what we need. More children.
Tuesday, April 12, 2011
Planting in the Yellow Greenhouse
Here we go... Planting in the Yellow Greenhouse this past weekend is FUN!


I started 40 Super Beefsteak tomatoes and 40 Roma's.

I would have done more, except that I ran out of paper pots.

I could have sworn that I made more, so back inside to collect more of my dear husbands read newspapers... It's important that he's already read them. Take note!
I bought this wonderful little tool at: www.underwoodgardens.com
 |
| PotMaker |
I tried to use a drinking glass one year, but this little guy (gal?) is just easier to use. It was created for this purpose, after all!
 |
| This is a super important step in my "Plan to Can" everything that grows in our garden, for our family. |
But perhaps the best part of the day still remains that I got the first flower of Spring 2011 from my sweet baby girl!

Monday, April 11, 2011
Our Yellow Greenhouse
I should have posted this earlier, as we were making it. I publicly and officially apologize for my lack of foresight on your behalf. PLEASE forgive me. But as life goes on the farm sometimes, I NEEDED to just get it done! Especially because it's Spring and planting season is just around the corner.
So enough apologies, I'm telling you about it NOW!
You see we wanted a greenhouse. For years we've wanted a greenhouse. I can't really say that it was a need, because obviously we've survived without one, although every year we address the fact that we want one. And for years we've said we'd buy one with "our next income tax return." But for some reason the income tax return would always cover our immediate needs, but never our wants. (God IS Good to us!)
We own a yellow school bus (long, boring story) that we've been using for storage. We NEVER have enough storage buildings. Okay, we only have ONE storage building; and it's full! Envision sides bulging out.
So I've been (obsessively) thinking about what we could do (cheaply and affordably) to "create" a greenhouse out of things we already have. Or at least mostly have (I did have to buy some things... like duct tape and plastic.)

Our bus is parked with the rear door facing south so that it gets sunshine all day.


At the front walkway and at the rear "emergency exit" we overlapped the plastic so that we can get out easily.


Our heat source is a cheap little ceramic heater that we already owned. We brought power to the greenhouse with a long extension cord through the driver's side window and duct-tapped it shut.

So enough apologies, I'm telling you about it NOW!
You see we wanted a greenhouse. For years we've wanted a greenhouse. I can't really say that it was a need, because obviously we've survived without one, although every year we address the fact that we want one. And for years we've said we'd buy one with "our next income tax return." But for some reason the income tax return would always cover our immediate needs, but never our wants. (God IS Good to us!)
We own a yellow school bus (long, boring story) that we've been using for storage. We NEVER have enough storage buildings. Okay, we only have ONE storage building; and it's full! Envision sides bulging out.
So I've been (obsessively) thinking about what we could do (cheaply and affordably) to "create" a greenhouse out of things we already have. Or at least mostly have (I did have to buy some things... like duct tape and plastic.)
Our Yellow Greenhouse!

Our bus is parked with the rear door facing south so that it gets sunshine all day.

We lined most of the inside of the bus with heavyweight plastic, held up with duct tape.


A LOT of duct tape!
We bought the heavyweight plastic (weatherproofing that was on sale for half-price!) at WallyWorld. The only time we had to cut plastic was for the front entrance and rear emergency exit.

At the front walkway and at the rear "emergency exit" we overlapped the plastic so that we can get out easily.

In the hotter part of the summer, we'll remove (and store) all the plastic to reuse in the fall and winter.

Our heat source is a cheap little ceramic heater that we already owned. We brought power to the greenhouse with a long extension cord through the driver's side window and duct-tapped it shut.

This will work until it starts warming up, and then it's easily removed so that the window can still be used for air circulation. I'm am thinking about putting a small fan that we already own in that window later on in the spring/summer.

Held in place with duct tape, of course! In the really hot summer, we may have to abandon the greenhouse, but we'll see... I might come up with something yet!
Perhaps an air-conditioner????
"Husband? Can I buy an air-conditioner for the greenhouse?" (Yeah, right!)
Tuesday, March 9, 2010


Wednesday, February 3, 2010
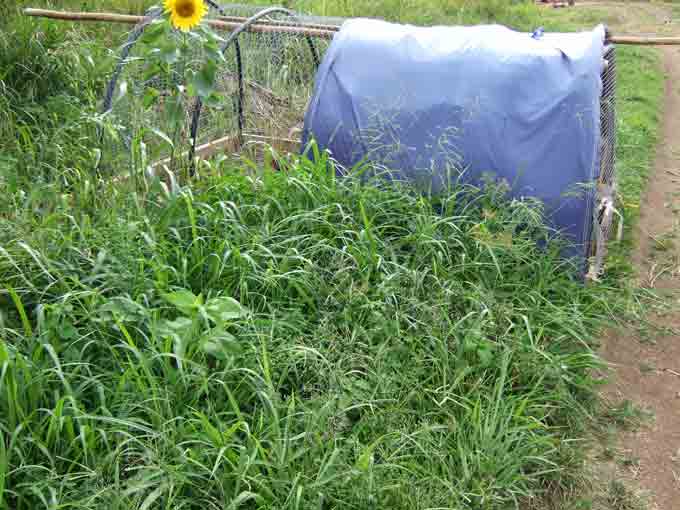
Facebook | Veggie Gardening Tips: A Chicken Tractor in Every Backyard Garden
This is a really good website for gardening. Giving credit where credit is due:
Veggie Gardening Tips. All links go to them.
Facebook Veggie Gardening Tips: A Chicken Tractor in Every Backyard Garden

Veggie Gardening Tips. All links go to them.
Facebook Veggie Gardening Tips: A Chicken Tractor in Every Backyard Garden
Thursday, May 14, 2009
Aphids and homemade insecticidal soap
I found this wonderful article on Aphid and homemade insecticidal soap on one of my favorite blogs: TennZen: Enlightenment Southern Style.
Now she is several months along in her gardening since she is blogging from Tennessee, however, that's all right with me, since it gives me advanced insight. (I do better with non-emergencies, how about you?) Anyway, be sure to read her second posting about how well her homemade insecticidal soap worked. You can find it at: Results of using homemade insecticidal soap and price comparison.
Now she is several months along in her gardening since she is blogging from Tennessee, however, that's all right with me, since it gives me advanced insight. (I do better with non-emergencies, how about you?) Anyway, be sure to read her second posting about how well her homemade insecticidal soap worked. You can find it at: Results of using homemade insecticidal soap and price comparison.
Friday, March 27, 2009
Create Seed Starting Pots From Newspaper
Here's another Seed Starting Newspaper Pot idea! Thanks Grocery Cart Challenge!
Tuesday, March 24, 2009
Topsy-turvy Tomatoes
Topsy-turvy Tomatoes

Tomato plants love the sun, so even if you plant them upside down, they'll find their way to the light. For a fun family project, give it a try and see for yourself. You can buy hanging planters from garden suppliers (such as gardeners.com) or make your own. Here's how.
CRAFT MATERIALS:
Sturdy bucket with a metal handle and cover
Drill with large bit
Sphagnum moss
Tomato seedling
Dirt and compost
Time needed: About 2 to 3 Hours
1. Thoroughly clean out the bucket. Drill and cut a hole about 2 to 3 inches in diameter in the bottom of the bucket (a parent's job). Put some moss in the bottom of the bucket all around the hole to keep the tomato plant from falling out when you first hang the bucket.
2. Gently thread the upper 2 to 3 inches of the seedling through the hole, keeping the roots inside the bucket. While you hold the plant in place, have your child loosely pack dirt around the stem up to the root-ball. Then you can let go and add enough soil to cover the roots by about 2 inches.
3. Add a couple of cups of compost and more soil so the bucket is filled to just an inch or two below the rim.

4. Hang the bucket by its handle and water the plant thoroughly, until water starts running out of the hole. Water the tomato plant regularly, adding more soil and fertilizer if the level in the bucket falls. Keeping the bucket covered will help retain some moisture. As the plant grows out of the bottom of the bucket, its leaves will curl up toward the sun in search of the light until the tomato fruit appears and weighs them down.
Carla's Notes: There are some great buckets to use at Home Depot for about $2.38 each (in our area.) A serious savings over the original of this product. Also, remember that these are significantly heavier than a normal hanging planter, especially with water in it. Make sure you hang it in a VERY sturdy spot.
Thursday, March 19, 2009
2009 Garden Plan

It's the day before Spring arrives! And our garden plan is finished! Well, not likely! But that's the beauty of a "plan." You don't have to follow it! I am always tweaking, and changing, and adding and subtracting. This is for our 2009 garden, and I had so much fun using my children's paint, colored pencils, and markers.
It is based on the sad fact that we still do not have one greenhouse, much less the two I'm plotting for. So I am limited to what I can't pre-start, again. Most of the garden will not need pre-starting, I will direct sow. I am thinking of moving my living room around to try to squeeze in a rack to start tomatoes. We'll see what we come up with in the creativity area for our too small living room. I would really like to pre-start enough veggies and flowers, that we can have enough for our own use, and I could sell starts from our property.
Are you planting a vegetable garden this year?

Are you planting a vegetable garden this year?
Needing? A Greenhouse


It happens to me every year. I get to this point in the season, and I wish, desire, NEED a greenhouse (or two.) But we also have too many things working against us. Too many "needs." Now I put the word need in parenthesis because I truly do not have any needs. I have a roof over my head, food to eat, and clothing to wear. I AM thankful for what I have. God IS taking care of me. So is it truly a need? Well, no. And, I understand that.
But I keep thinking about what I could do with a greenhouse that would really be a blessing to others, as well as myself and my family:
- Have enough starts to grow extra food and flowers on our property, for needy families to gleen. (Beautiful flowers are important to the needy, too!)
- Have enough starts to sell extras to local families at reasonable prices.
- Have enough starts that our garden is more affordable.
- Each year the greenhouse would help pay for itself (amortization.)
Anyway, that is some of the ways I can justify my desire (not need) of a greenhouse (or two.)
I desire the biggest that Ziggy's can deliver on-site (8' X 16'). We need the extra stability because of the spring winds.
Saturday, March 7, 2009
Garden Update: 'maters and 'taters'
I know it's early... but these people are in Tennessee, and their planting right now. She's posted a great article on planting potatoes in tires. I won't be able to find it if I wait, I'll forget who it was and where it was, so we're getting it now!
Wednesday, February 18, 2009
DIY Seed Tape
A homemade seed tape is a sheet of paper towel, cut to size, that your flower or vegetable seeds are “glued” to. This allows you to plant perfect straight lines in your garden and they are also perfect for containers and borders. Seed tapes allow you to maximize your growing area and get the spacing right on your plants every time. They make growing almost anything easier especially carrots, chives and flowers. Small seeds are easier to see against the background of the “glue” or paper towel, than against the dirt, so you can space them better, thus lessening the need to “thin out” later.
You can also use single sheets of newspaper, but we don't have any newspapers right now, because we have two new puppies!
This is a great activity to help combat January/February cabin fever that hits some people at this time of year. (Yep, that would be me! There's not a brown blade of grass or dirt in sight!)
Step One: Lay out a sheet of paper towel on your work table.
Step Two: In a (freezer strength) zip-lock bag, make a paste out of flour and water. Do not ever use glue. Mix together until it forms the consistency of a thin glue. Snip a very tiny corner off the zip-lock bag.
Step Three: Place your seeds in a bowl and get some tweezers if they are too small and hard to pick up.
Step Four: Lay out one paper towel in front of you. Use a tape measure and mark dots where you want to place your seeds. Also mark where you want to cut, if making more than one tape out of the same paper towel. You will most likely be able to get several strips from one paper towel depending on the size and shape of your garden space and how intensive you intend to plant. Look at the seed packet for recommendations on spacing. Dot some paste onto your spacing marks, using the zip-lock bag of “glue.”
Step Five: Place a seed on top of the glue using the tweezers, if necessary. The paste acts as a glue holding the seeds in place. Do not use regular glue. If the seeds won't stick then make your paste thicker by adding more flour.
Step Six: Repeat step 5 until all your seeds have been glued in place. Let the seed tapes dry completely and then store in a dry place, such as a shoe box with a lid. You can place a book on top to keep the tapes from curling. I cut the strips apart later, around planting time, rather than at this point.
Step Seven: When its time to plant your garden, cut your seed tapes into your pre-designated strips. Lay out the seed tape where you want your flowers or vegetables to grow. Then cover with a thin top layer of soil. Look at your seed packet for the specific amount your seeds need to germinate. They can be printed directly onto the tapes as they are being made, if desired. This is how I do it.
Step Eight: Water according to your plants preference and grow as you normally would. The seeds will come up in perfectly straight lines exactly where you placed the seed tape. The paper towel will be kept in place as it deteriorates becoming mulch which is good for your garden.
If you want to be creative try mixing different seeds onto one seed tape or when planting your garden alternate strips of different kinds of flowers. Under supervision this is also a great project for children to help make.
Seed tapes can be taylor made to the size and shape of the container you are planting in. Round, Rectangular, or strips, of any size.
Monday, February 16, 2009
The Rose: Medicine and Food

The Rose: Medicine and Food
By Sharon Brown (Sharran)
February 15, 2009
There is nothing quite as beautiful as the rose. Throughout its long history it has not only been admired, sniffed, and coveted, but it has also been used as food, as drink, and as medicine. Isn't it interesting how endearing and enduring the rose really is?
"Won't you come into the garden," said Richard Sheridan, "I would like my roses to see you." (1751-1816)
I spent my childhood drifting from one flower to another. My older relatives, the ones who had the greatest influence on my life, believed all plants were used for food or medicine and only rarely were they appreciated for their beauty. I was caught between my mother's love for their beauty and my Granny Ninna and great Aunt Bett's appreciation for the food and medicine they provided. I spent my childhood in a quandary!
I loved to decorate, to create things, to color my world, so I picked flowers for their beauty, and I used their petals and leaves for dyes. I wove flowers into my hair, and dressed in clothes that were painted with dyes. And of course we must never forget the streaks of color that ran through my hair. The rose was different. In my world, we used the rose only for its beauty in a bouquet, as a corsage, or blooming merrily in my mother's front yard. No one ever thought to use it for anything else.
It is a good thing that Aunt Bett didn't know about the ancient uses of roses for food and medicine. In those ancient days rose petals, which have tannin, were used as an astringent to control bleeding. They were also made into an infusion to treat stomach disorders. Rose oil and rose water were used in China for stomach problems. It seems that the Rosa Gallica was the most superior rose for medicinal uses. In liquid form it was used as a tonic, in powder form it strengthened the stomach and aided digestion. A conserve was considered excellent for treatment of colds.
I remember the first time I ever noticed rose hips. I thought they looked like tiny orange apples and wondered how they tasted. I don't remember if I tried them or not, I probably did, but I do know now that rose hips are indeed edible. They are very high in vitamin C and you will often see them listed as the main source of vitamin C in many commercially available vitamins.
Rose water was used to prepare food and to season dishes. It is mentioned in 14th century French cookbooks, and by the Regency period it was used for perfume, but also to treat infected eyes and eyelids. In Persia they drank rose water, and the Greeks created a drink from the Corinth grape mixed with rose water and spices. The French used enormous quantities of roses in sugar plums, creams, ices, oils, essences and fragrant powders. The petals of the rose when freshly picked can be bruised in a marble mortar until they reach the consistency of a paste, and the paste can be used in confectioneries. In England and France necklaces and bracelets were made by making small pea-sized balls of the paste and letting them dry. Just before they were entirely dry, a needle and silk thread were run through them. Finally after some time they become hard like wood and brown in color, and emitted a beautiful fragrance. The rose scent within the beads will last for many, many years. Some people today make rosary beads from rose petals.
If we travel even further back in time, we find that Pliny the Elder recorded thirty two different medicinal uses of roses in the first century. Roses were grown in Medieval gardens more for medicines and food than for beauty. Rosa rugosa were used for the prevention of scurvy. It also seems that red roses were the choice for medicines of the ancient healers. Among other treatments, rose oil was said to reduce cholesterol, tea made from dried rose petals was used to cure headaches. The petals combined with wine were used warm as eardrops. Women believed that if rubbed on the skin, the petals would eliminate wrinkles and preserve youth. In the 19th century, it was proved that roses contain essential oils, potassium and iron. Wow! That is more information than you really wanted to know, but isn't it interesting?
There are still those who believe the rose balances the heart and governs emotions. Maybe that is why roses have been the ideal gift to express love and forgiveness for thousands of years. My heart lifts when I see the first rose bud in springtime, and I continue to watch it through its every phase of blooming. I count the buds, waiting for the next one to open, knowing that each one will bring another smile. I remember the very first rose bush of my own. I don't remember the details, but I probably had been in trouble for one thing or another, like staying up on the mountain until after dark, or dyeing polka dots on my brother's best Sunday shirt. Or it could have been when I discovered bleach, and played tic tac toe on the knees of my little brother's jeans, with him still inside them. After a week or so of being denied the fun of roaming the mountains (the very worst possible punishment) my parents planted a rose bush just outside my bedroom window. It was the Sterling Silver rose.
Whenever I see a rose in the silvery lavender color that resembles Sterling Silver, I remember the rose blooming outside my bedroom window. Just like the Rose Window in churches, it is a sign of love and forgiveness.
Here is a recipe from the 16th century used to make rose hip tart:
Rose Hip Puree
1 1/2 cup prepared rose hips
3/4 cup water
2 Tablespoons sugar
1/2 teaspoon cinnamon
1/2 teaspon ginger
1 Tablespoon lemon juice
Simmer the prepared rose hips in water until soft, about 10-15 minutes. Stir in sugar, spices and lemon juice and simmer for 5 minutes. Use puree for tarts, ice cream toppings or to eat as a sauce.
Source for more recipes: http://www.amycorwin.com/regency_rose_receipts.htm
Sources for medical uses of roses through history: http://www.angelfire.com/journal2/flowers/roses3.html
http://talewins.com/Treasures/essays/Roses.htm
Gloria Cole has written an excellent article on Native and Naturalized Roses of North America. It is filled with recipes and other valuable information. Please view Gloria's article here.
All photographs of roses in this article were taken by Zuzu, and are of roses in her gardens in California. For more photos visit her on DG's Rose Forum. This series of rose articles is dedicated to Zuzu, with thanks for sharing her love of roses with me.
Happy Birthday, Zuzu!
Friday, November 28, 2008
Gardening: In November?

Yesterday on Thanksgiving we got our first really hard frost. It's late this year. Even got a touch of snow. Today is a frosty day, about 32 degrees. My son just told me it's snowing lightly. I should be listening to Christmas music, baking, decorating our house for Christmas (what little room we have for decorating, that is.) So why would I be thinking about next years garden?
I am really wanting to grow a garden next year to help with our family food costs. We'd also like to see if we can sell some of our produce, locally. We've tried gardening before, and the deer eat it (duh, we live in the country. What were we thinking?) I've done container's of Tomatoes on our deck, and caught our three-year old feeding the "pretty" red ones, to our chickens. Hmm, how to explain to a three-year old that the tomatoes shouldn't be fed to the chickens just because they like them. This year, we've bought the material for an eight foot "deer/toddler fence." We bought enough (we think) to surround one of our ten acres. Not a small purchase, mind you! However, the goal is to start our landscaping tree farm and my home garden, all nicely protected from huge long-legged rats.
Now, why am I thinking so far in advance? I mean it's November after all. Good question! And the answer is, I hope just as good. I am starting a business January through April 15th. Can anyone guess? Yes, I am going to work from home through the tax season doing Personal and Business Taxes. This falls in line with my accounting degree and I am busy right now, re-familiarizing myself with current tax laws. I am working towards being busy enough that it would be a good idea to have my garden strategy all planned out before tax season starts.
So, I am attempting to have my home, berry, and herb garden plots all designed, and the seeds/plants purchased, before the tax season busyness starts. I will need to pre-plant my starts sometime mid-March, so I can't procrastinate now.
If I can figure out how, I will be posting my garden design on this blog, and you all can encourage me, and maybe help me improve.
Now before I post anything further, let me assure you that I grew up gardening, cooking, freezing, and canning homemade foods. I added dehydrating in my twenties and thirties. The only thing I am not proficient at is root cellaring, but since I don't have a root cellar it's not a problem. (I am working on that, husband is not cooperating, yet.) We will at least need a larger, cool and dark, storage room. I may need to get creative on that (under the beds?)
I got my husband out on his 1940-something Ford 9-N tractor to plow up the tree/garden space about a week ago. I am pretty excited that he did it this fall, rather than waiting until Spring. I'd still like to see some manure spread out this fall, however, I don't think I'm going to get that. So working on the compost piles of leaves, is a good start. I am asking the kids to rake up the leaves into bags, and set them next to the chicken coop. Then as the snow falls, they can spread out the leaves in the outside chicken pen. The chicken's should love to scratch around in, and poop in the leaves, and it should make some might fine compost to add to our garden in the Spring.
I am adding some links to some great websites and blogs I follow:
Garden Plans Internet Software
In My Kitchen Garden: Blog
Better Homes & Gardens: Gardening Plans
Thanks for listening!
Wednesday, October 29, 2008

Subscribe to:
Posts (Atom)


